Moving Around the Map | Study Sites | Legend | Layers | Measure | Basemap | Print | Coordinates | Pop-up | Table
Moving Around the Map
![]() Zoom in and out of the map using the + and – tools located in the upper left hand part of the map.
Zoom in and out of the map using the + and – tools located in the upper left hand part of the map.
To move around the map, click on the map and hold the left mouse button while dragging, then release the left mouse button. This pans the map to different areas, but does not change the zoom.
![]() If you get “lost” on your map, use the home button to go back to the initial extent, which is the state of Connecticut.
If you get “lost” on your map, use the home button to go back to the initial extent, which is the state of Connecticut.
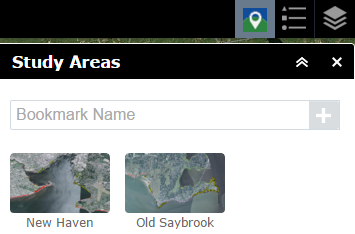 Study Sites
The project had two study sites as discussed on the maps page. This icon ![]() shows the two study sites. Click on one to zoom right to it.
shows the two study sites. Click on one to zoom right to it.
Legend
Click ![]() to view the legend of any layers that are currently visible (checked on).
to view the legend of any layers that are currently visible (checked on).
Layers
![]() The layer list button in the upper right is one of the most useful buttons on the map. Click on it to see all the layers that, together, make up the map. The layers form a stack (bottom of the list draws on the bottom of the stack) and can be turned on and off. A check mark means the layer is turned “on” or visible (as long as no other layer higher on the list is turned on and is hiding it from view).
The layer list button in the upper right is one of the most useful buttons on the map. Click on it to see all the layers that, together, make up the map. The layers form a stack (bottom of the list draws on the bottom of the stack) and can be turned on and off. A check mark means the layer is turned “on” or visible (as long as no other layer higher on the list is turned on and is hiding it from view).
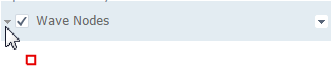 The little arrow to the left of the layer expands the layer so that it’s legend, or symbology, is visible.
The little arrow to the right of each layer hides some useful options including:
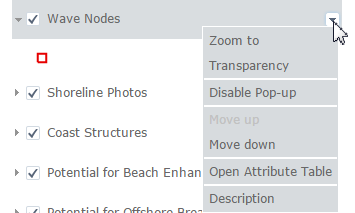
Zoom To – zooms to the extent of that layer.
Transparency – makes the layer see-through. It is a sliding scale from 0% (nothing showing through) to 100% (layer is completely transparent and therefore not visible).
Move Up and Move Down: Changes the order of the layers (which is also the drawing order).
Description: links to the REST endpoint of that layer. This is where you can find some basic (and code-like) information about the layer, such as what server its coming from (look at the URL), the extent settings, attributes, pixel size, etc. Some layers include a detailed description, some do not.
Measure
![]() Click on the measure tool to roughly measure an area, line or location. Click for each corner or vertex and double-click to finish the shape. Change the units as desired.
Click on the measure tool to roughly measure an area, line or location. Click for each corner or vertex and double-click to finish the shape. Change the units as desired.
Basemap
![]()
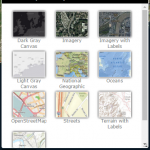 Click on the basemap icon to choose what layer is displayed underneath. The default layer is aerial imagery, but other options include streets, simple canvas maps and terrain.
![]() Click the print icon to print your map.
Click the print icon to print your map.
Coordinates
![]()
 The Viewer displays X,Y coordinates along the bottom. These coordinates are the location of the mouse as you move it over the map or a specific point if you click on the map. Click on the star and then the map to find the coordinates of any location as indicated by the green pointer.
Pop-up Information
Clicking on the map is another way to get more information about the feature or location that you click on. The information is shown in a pop-up window and is only displayed for layers that are turned on (checked) in the layer list (see Layers above).
If a location is clicked where more than one layer exists and is turned on, multiple pop-ups are present and are revealed in the top banner. To see the next result, click on the tiny right arrow in the upper right of the window. The next result is visible Click the little arrow again for the next result.
Table
This arrow can be found along the bottom edge of the viewer. It opens the tabular information (attributes) for the layers in the map. This is not for the faint of heart! The layers are listed as tabs. There are many options here like selecting records and filtering. Also, click on any record in the table and then find it on the map.
![]()